
WARNING: Some of what you’re about to see gives credence to the saying that you shouldn’t watch sausages being made, especially if you like sausage. According to Wikiquote, the earliest iteration of this saying is the quote, “Laws, like sausages, cease to inspire respect in proportion as we know how they are made,” attributed to American poet John Godfrey Saxe in 1869. I’m no poet, but I have seen the Schoolhouse Rock cartoon “How a Bill Becomes a Law” several times, and now that I have seen sausage being made — well, I have to agree with Mr. Saxe. Although we appreciate and enjoy the Charcutepalooza challenges, this month’s trial — stuffing sausages — was challenging indeed (at least to me, in terms of the gross-ness factor.) You have been warned.
As usual, we thank Charcutepalooza organizers Mrs. Wheelbarrow and The Yummy Mummy for pushing us (me) outside our cooking comfort zone (and kitchen cleanliness zone) and encouraging us to experiment with new culinary techniques. This month, we felt especially inspired and quite literally encouraged, after attending their meat grinding and sausage making demo at the BlogHer Food ’11 conference. Along with Sean from Punk Domestics, they put on a wonderful demonstration and made some excellent chorizo, breakfast sausage and Italian sausage, all while entertaining the audience and making charcuterie look easy and fun! We thoroughly enjoyed it and attempted to channel their enthusiasm and expertise when making our own sausages this month.
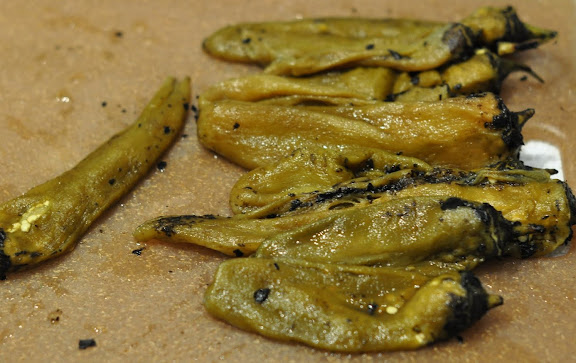
For the challenge, we decided to do chicken and green chile sausage. For the chile portion, we thawed some of our Hatch green chiles, since they have such great flavor and had already been roasted.
To prepare the chiles, cut them open, scrape out the seeds, chop up the chiles and place them in a bowl in the fridge. When making sausage, it’s best to keep all ingredients as cold as possible throughout the process.
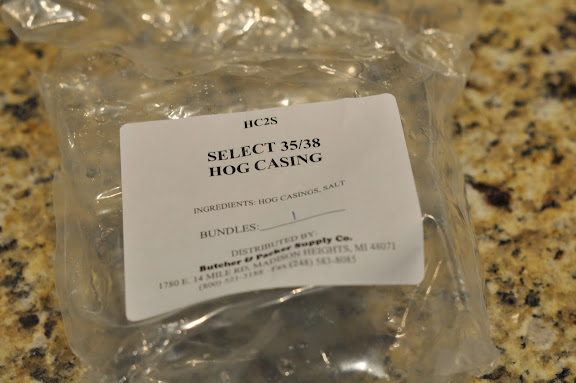
To prepare yourself for the following photos, you should be aware that the sausage casing is, in our opinion, the most un-appealing part of the sausage-making process. The worst is knowing specifically what a hog casing is (Google it if you dare.) Dan ordered ours online, although we recently discovered that our local Central Market also sells them. (It’s amazing what we find ourselves looking for — and getting excited about finding — in the grocery store, now that we’ve been participating in Charcutepalooza. “Look, Honey – they sell intestines here!”) Incidentally, when you order hog casings online, the “bundle” includes quite a few casings. As in, we likely will never have to buy casings again, and if you ever feel inclined to make your own sausage and you live in our area — stop by and pick up a few, or 20.
Here we go . . . That “bundle” is a mass of hog casing packed in salt. At this point, Dan says the casings feel gritty and really weird. I took his word for it.
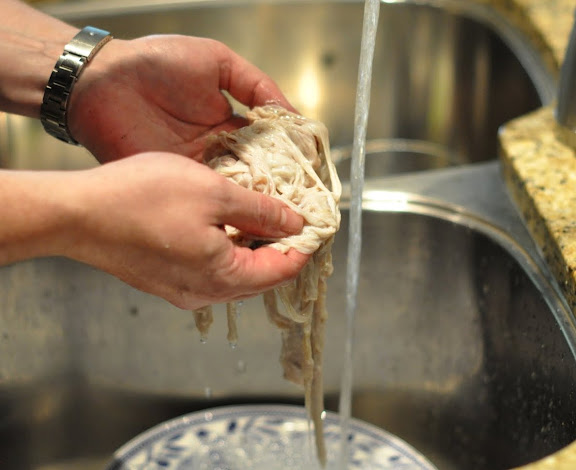
Before using the casings, you have to rinse off all the salt. While chanting to yourself “Pretend it’s pasta. Pretend it’s pasta.”
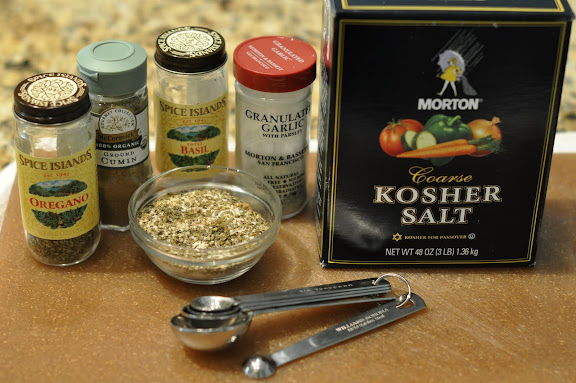
After blocking the sausage casing rinse horror from your memory, assemble the seasonings for the sausage. Mix together a tablespoon each of cumin, oregano, basil and granulated garlic (although we might use a little less cumin next time), as well as a tablespoon and a half of Kosher salt. In a separate bowl, mix together 3 tablespoons of tequila, 2 tablespoons of vegetable oil and 2 tablespoons of water. Then put the bowl with these liquid ingredients in the freezer for about an hour — you want them to be super cold, but not quite frozen.

Prepare the chicken by cutting it up into small cubes. We used chicken thighs because we like the flavor of the darker meat. One of the tips we learned from the BlogHer demo was that the meat is a lot easier to cut if it is very cold — even slightly frozen. Starting with very cold meat when making sausage is also a good idea since the meat is raw and you’ll want to keep it cold throughout the entire process.
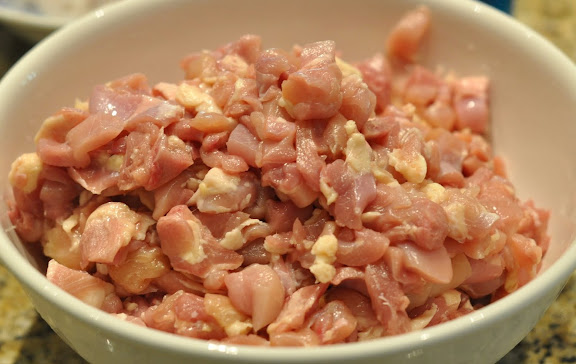
We didn’t trim the fat from the chicken thighs before cutting them up because a little fat adds a lot of flavor.
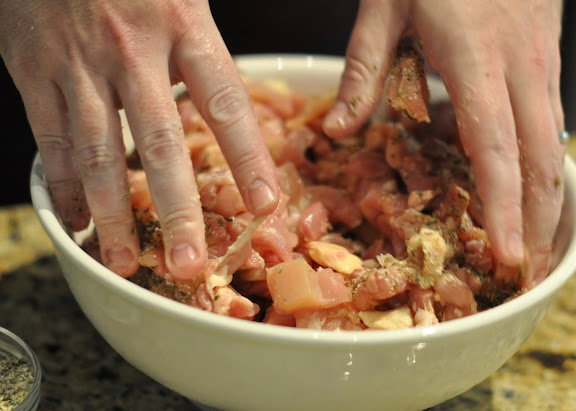
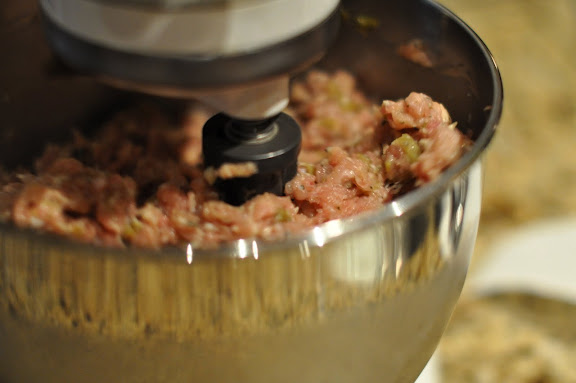
Mix the dry seasonings in with the chicken.
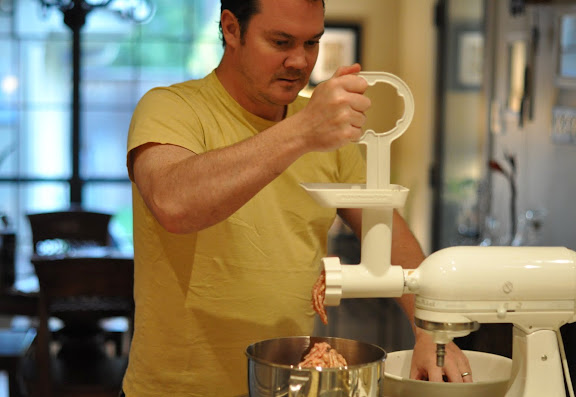
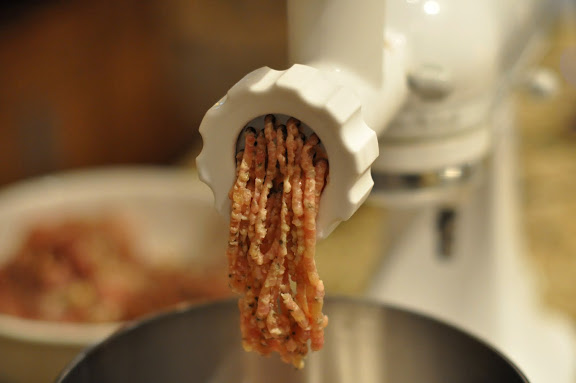
Load the chicken pieces into the Kitchen Aid set up with the grinder attachment (which should have chilled in the freezer for several hours before you begin grinding.) Another invaluable tip we learned from the BlogHer demo is that the purpose of that handy large plunger accessory thingy is to push the meat down into the grinder. Who knew? Clearly we did not when we did the grinding challenge last month. Oops.
Place the bowl into which the ground meat will fall in another bowl filled with ice to keep everything cold.

Charcuterie makes Dan happy.
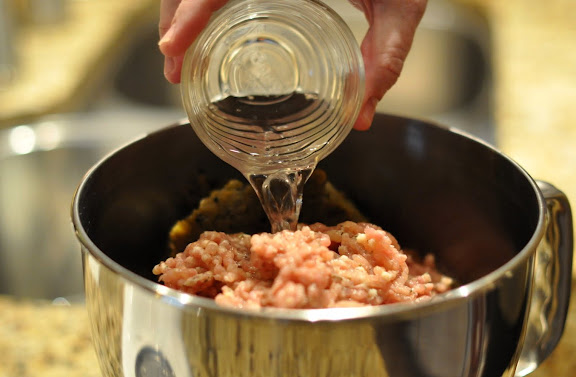
After grinding up all the chicken, add the cold liquid ingredients…
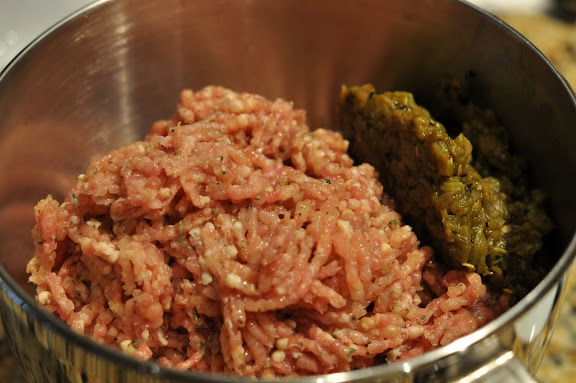
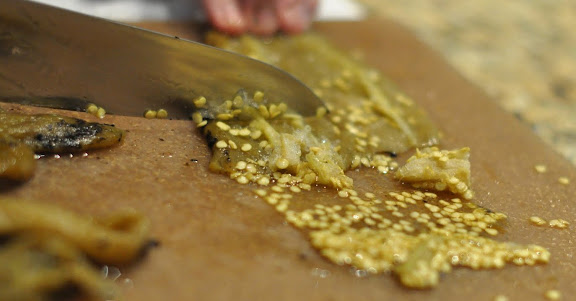
…then add the cold green chiles…
…and mix everything together with the Kitchen Aid paddle attachment (mixer set on low) for about 1-2 minutes, until the ingredients are well combined.
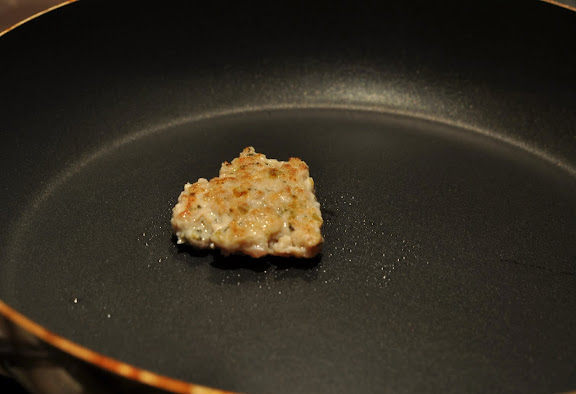
Place a little patty of sausage in a hot skillet to taste and make sure the seasonings work. Mix in additional seasonings as needed.
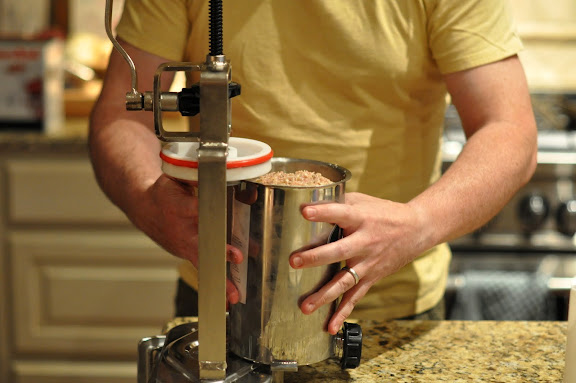
Another new charcuterie challenge = another new kitchen toy for Daniel. Although there are sausage making attachments available for the Kitchen Aid mixer, various online reviews recommend using a separate sausage stuffing device. Dan bought this one from Amazon.com. The device attaches to the counter. Once the pieces are assembled, fill the receptacle with the ground chicken.
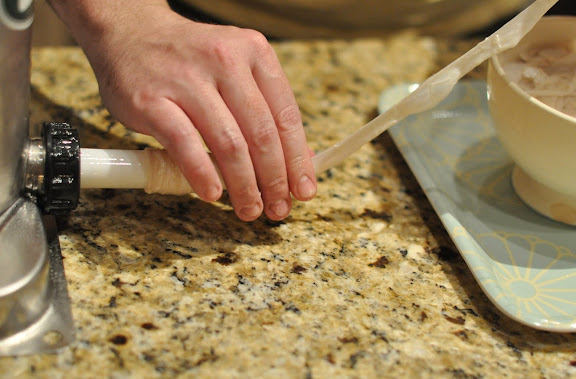
Add the appropriately-sized tube to the bottom and thread a cold hog casing onto the tube. (Yup, we know what it looks like. But we’re adults and like to think of this as a family-friendly blog so keep it clean, people!)

Stuffing sausage is a 2-person operation. One person has to manage the casing, while the other turns the handle on the sausage device that pushes the chicken down, out the tube and into the casing. And attempts to snap photos without irritating the person busy managing the casing.
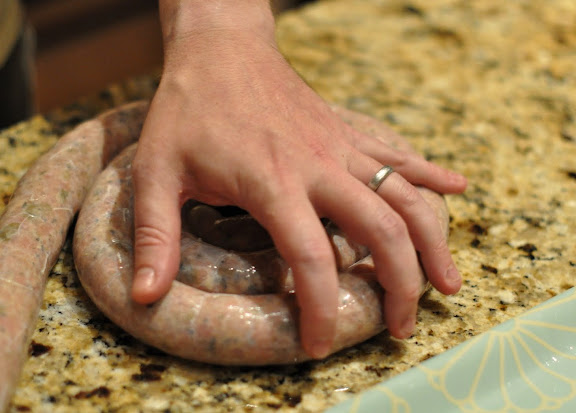
The casing is pretty long, so you need to coil it up while it is being filled. The surface you are working on should be a little slippery for this process, but not too slippery. Or else the sausage coil may slip right off the counter. Which, in addition to minor panic, might cause some bits of raw chicken to splatter out onto the front of the dishwasher when the sausage coil hits the kitchen floor. Maybe. If the surface is too slippery, this could be a possible outcome. Not that we would know anything at all about this potential scenario.
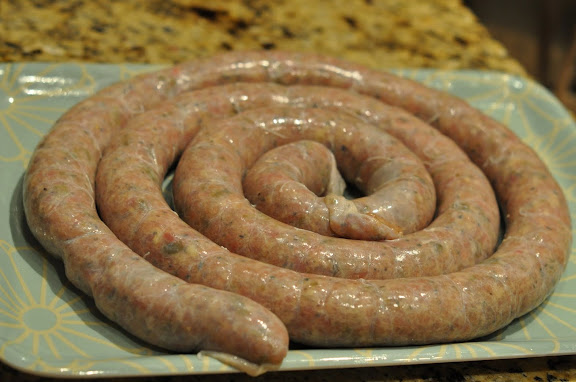
Sausage coil, ready to be twisted into individual sausages.
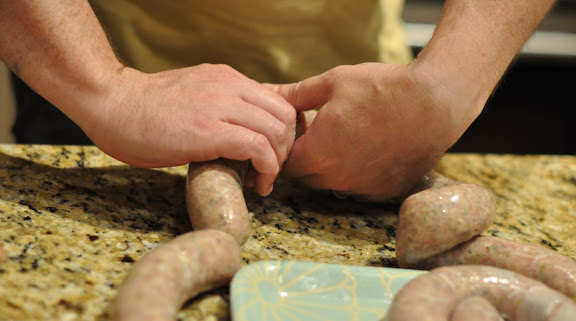
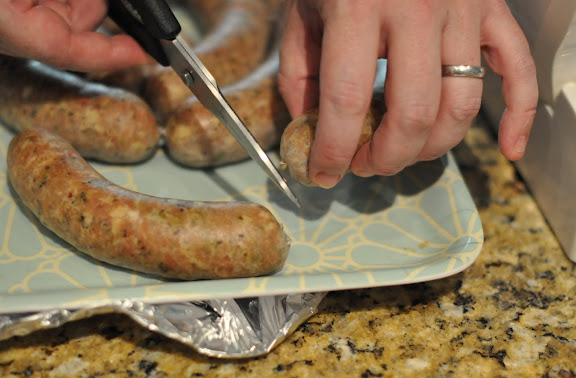
Tie off the sausage into links by marking off the size you want and twisting each end of the pieces 7 times along the length of the filled casing.
If you see any large air bubbles in the sausages, you can get rid of them by poking tiny holes in the casing with a (sterilized) safety pin. Keep the links together (attached) and refrigerate overnight.
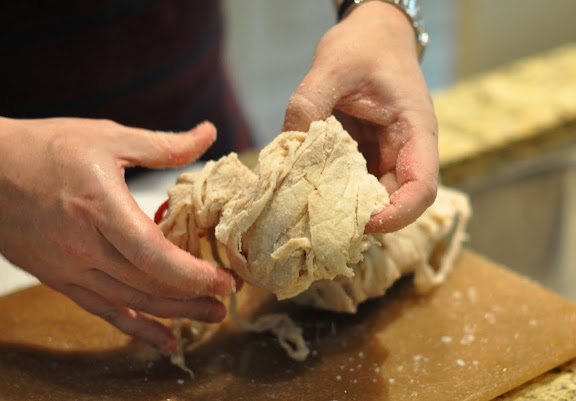
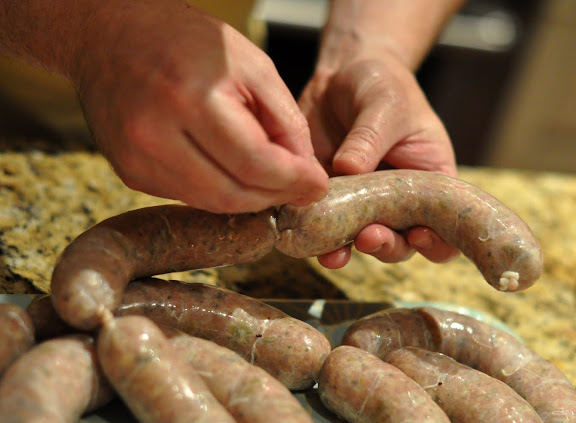
Once the sausages have dried out a bit, cut the links apart. At this point we had no idea whether the twisty knots would hold, or whether each of the sausages would leak out and spill even more raw chicken. Luckily, the knots held up just fine. Whew.
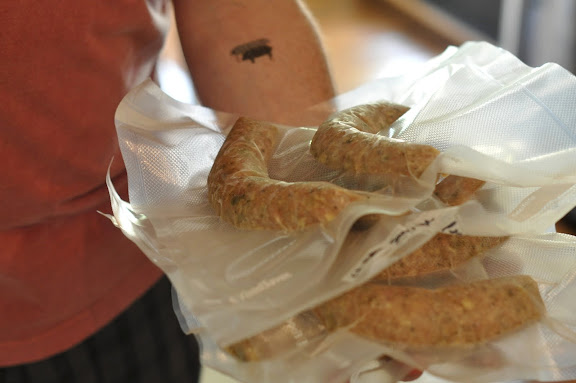
We made enough sausages to freeze several batches for later use. You may have noticed Dan’s tattoo in the above photo (or not, if you’re not one of our mothers.) It’s a pig with a sound bubble that reads “Charcutepalooza.” As much as he enjoys it, Dan doesn’t take charcuterie quite that seriously — it’s a fake tattoo, courtesy of Mrs. Wheelbarrow at the BlogHer demo (all attendees got tattoo’d.) Dan kept his on until it finally wore off. That sucker lasted a long time.

We cooked the sausages by first blanching them in a skillet with hot water for about 4 minutes each side, then grilling them. Cooking them this way helped ensure that the chicken got done all the way through, but the outside didn’t get over-done on the grill.
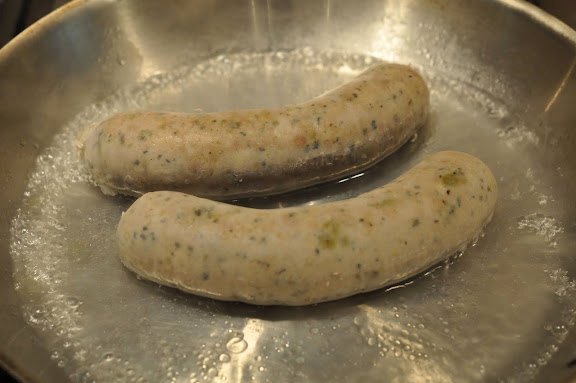
As the sausage cooks, the chicken turns opaque.
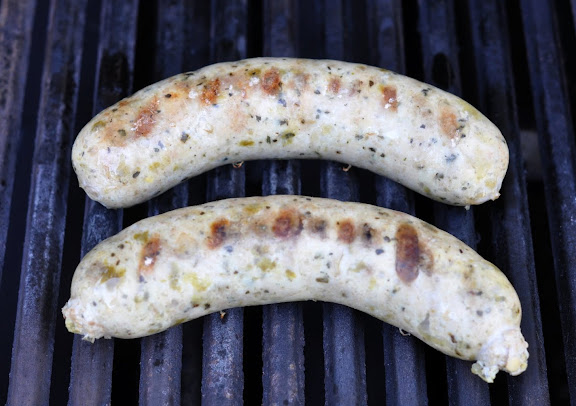
Next, grill the sausages over medium heat for about 4 minutes on each side.
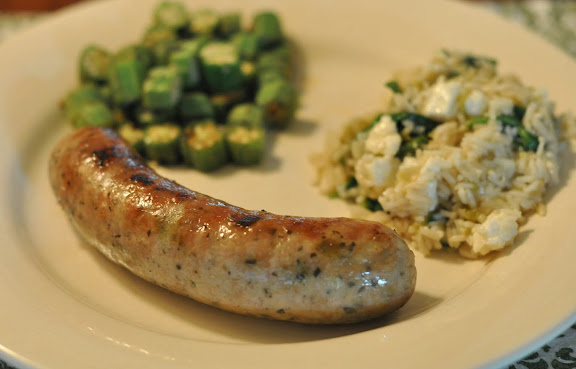
We served the sausage with sauteed okra and one of our favorite rice dishes. All unpleasant parts aside (CASINGS), the end result was delicious, and we would definitely do it again. (I should hope so, considering we invested in our very own sausage stuffing device.) Next time we’re going to try adding cheese — maybe pork sausage with jalapenos and cheddar cheese. And we just learned that next month’s Charcutapalooza challenge is hot dogs.
Heaven help me, and my clean kitchen.
Great post. What a hoot. Setting aside the grossness of the casings, it does look delicious and what a fun project. Can’t wait to see how the hot dogs turn out!
Bravo! Love your post.
Loved this entire post. The photos were awesome as were the descriptions and Dan’s work was amazing (even the tatoo!)
I’m so with you on the grossness of casings. What a visual treat your post is. This is a sausage I would love!
I love this posting! I’ve watched my grandfather (who’s 90 now) make sausage for years, and now I can share this recipe with him.
I’ve been following your blog for several months now — I’m a Colorado friend of Paula’s — and it’s easily my favorite cooking website. There are so many wonderful ideas; I’ve tried out several of them, and they’re always a success.
Thank you!
Thank YOU, Sarah! Nice to hear from you. I think maybe we met “in real life” at Paula’s wedding years ago… We’re happy that you have had success with some of our recipes! And I’m sure your grandfather is quite a bit more successful at making sausage than we are…
Great post! I appreciate how hard it is to take photos while in the midst of sausage stuffing!
That’s so funny about the casings – I could tell by the hand language in the “Here we go” photo that you were really not wanting to touch that nasty mess; good job in the bucking up department!
Funny how when you’re learning by yourself, the silly things you don’t get right away like the plunger…. I didn’t understand that I was to fill the entire casing then twist into portions when I was done.
Thanks to your blog, the light bulb is on… how silly am I? I ended up with two huge sausages instead of more smaller ones…
Great post, your sausages look wonderful.
Thanks! This charcuterie business definitely has a learning curve and is a work-in-progress! That twisting trick (and how to do it) is not intuitive at all. And up until the moment after Dan cut them apart, I thought for sure they wouldn’t hold and would ooze raw chicken all over the counter…
Great post, and oh MY your sausage looks and sounds yummy. As a person who harvested her own intestines from the gut pile, flushed and scraped them (a lot of work) to make home-made hog casings, I gotta say: I have no idea what all the fuss is about 😉 Okay, maybe I kinda get it. Your okra picture is making me all excited to harvest and eat some! My first time growing it. Thanks for another excellent charcutepalooza story!
WOW — making your own casings is hardcore! We are impressed (and I have to say I am a little horrified, but mostly very impressed!)
OK – I am so impressed… Not only do they look incredibly delicious but you made them yourself & truly passed the “this really grosses me out” test… I don’t think I could do that (and I’m a nurse!!!)
Thanks Nance! But I’m sure you’ve seen and dealt with much worse as a nurse! Once you get over thinking about what the casings actually are (not sure I ever did), they really aren’t so bad…
Thanks to All for the comment love! We always appreciate the feedback — nice to know people are reading!
I was curious as to how much chicken and green chilies you used. They look great and was looking forward to making some of my own.
Hi Alan,
Sorry we didn’t put quantities in the original post — we never really thought anyone would try making them! But we’re glad you are. When we made ours, we adapted this recipe, which calls for 7 pounds chicken thighs, 12 ounces roasted chiles and 3 jalapenos. We ended up using about 4 1/2 pounds chicken thighs and around 8-10 roasted chiles (which translates to about 3/4 cup diced, with seeds removed.) Hope that helps!
Did I miss something. How much chicken ( looks like 3 lbs.) and how many chiles (6). Thanks
Sorry got it can’t read
I was randomly looking for some new chicken sausage recipes and found this site – it is a great recipe but I was really surprised to see Dan, an old classmate at Pitt law. Please tell him I said hi!
Hi John! Wow, small world! Dan says hi and hopes you are doing well!
Beautiful!
I am new to making sausage, I have only done standard breakfast and a spicy sausage. What amount of chicken is used in this recipe.