
The regular football season has come to an end, and therefore so has the Steeler Opponent-City Challenge. It has been a successful season (more so for Foodie Lawyer than the Steelers), and we’ve enjoyed trying new dishes from so many cities and learning about their origins (the most colorful of which was probably Nashville Hot Chicken.) Some of the dishes were better than expected (Cincinnati Chili for example), others were so good that we’ll definitely make them again (hello, Crab Cakes), and a few were enjoyable, but not worth the effort (looking at you, Polish Boy Sandwiches.) Speaking of Polish food (and terrible segues), pierogi are pretty popular in the Cleveland area, so we were told by one of Dan’s friends who lives there. The Steelers’ second game against the Cleveland Browns this season gave us an opportunity to try making homemade pierogi for the S.O.C.C., and gave the Steelers a chance to redeem themselves from the turnover debacle that was their earlier game against the Browns. The Steelers were redeemed and the pierogi were successful, which brings the final S.O.C.C. tally to: Steelers: 8-8, Foodie Lawyer: 13-2. Better luck to the Steelers next season, and a healthy, happy and delicious 2013 to us all!
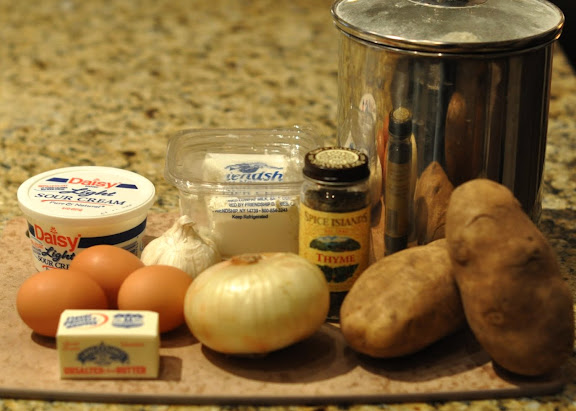
We found lots of recipes for pierogi on the Internet, but chose this one because it says it’s a family recipe, and we like the idea of following the pierogi-making footsteps of someone’s Polish grandmother. Pierogi also make me think fondly of work trips I used to take many years ago to Hartford, CT and the weekly lunch special at the local Polish Home — kielbasa, pierogi and sauerkraut (no sauerkraut for me though — extra pierogi instead.) Although they aren’t all that difficult to make, with simple ingredients of flour, eggs, sour cream and water for the dough and a potato and cheese filling, pierogi are pretty time-consuming. But they are worth the effort and freeze well, so you can make a big batch to have some now and save a couple of smaller batches for another time.
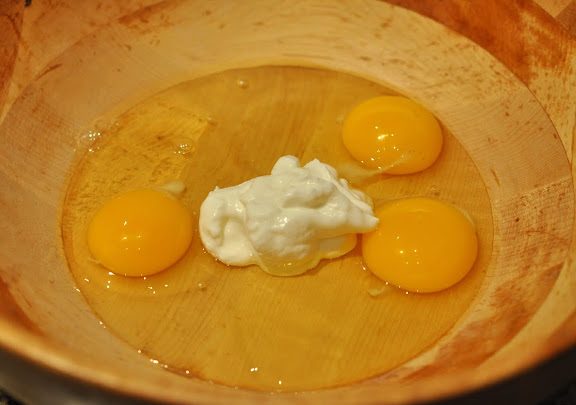
Start by making the dough, which will need to rest for 20-30 minutes before you make the pierogi. We strayed a bit from the original recipe by beating the eggs and sour cream together before adding any of the other ingredients.
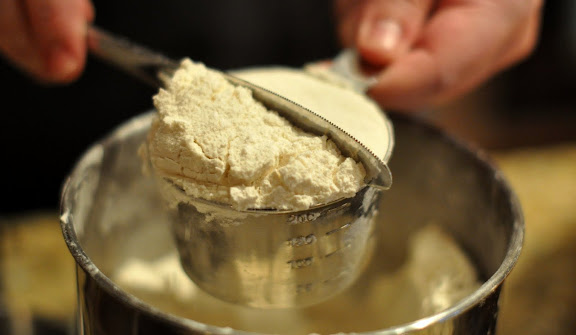
Next add the flour (using the flat edge of a butter knife to scrape off the excess flour from the measuring cup makes for a very precise measurement.)
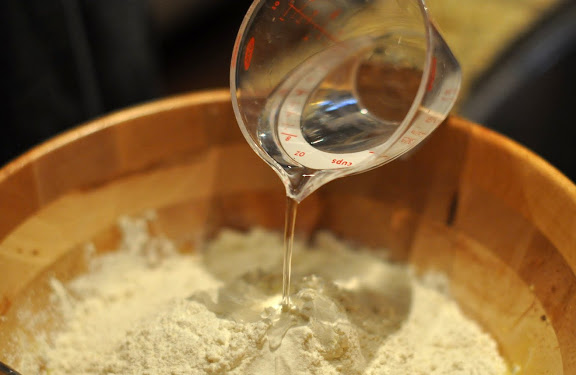
Then add the water.
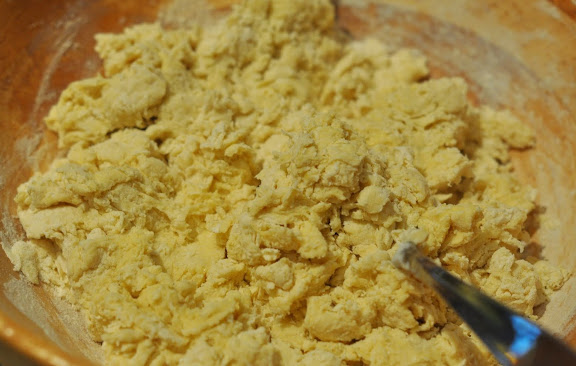
Mix the dough ingredients together until combined and there are no spots of dry flour.
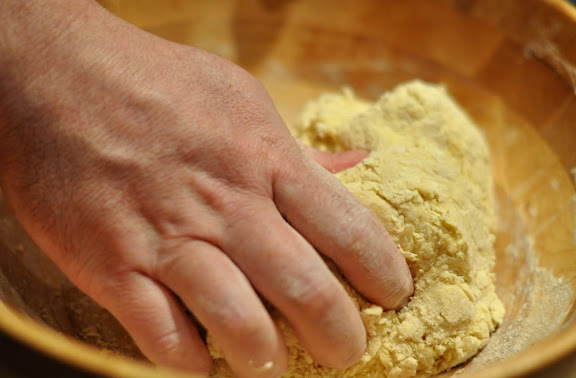
Sprinkle on some additional flour and work on a well-floured surface to knead the dough until the ingredients are well-blended and the dough is smooth and slightly sticky.
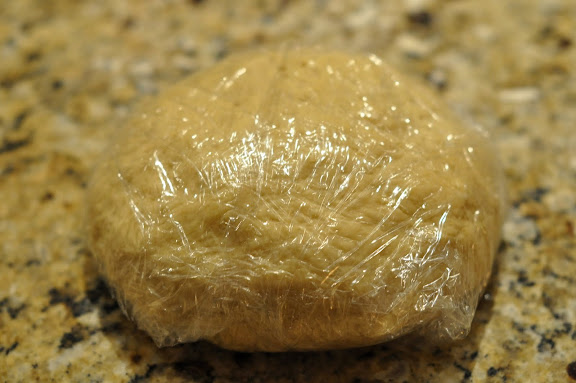
Wrap the dough in plastic wrap and allow it to rest at room temperature for 20-30 minutes.
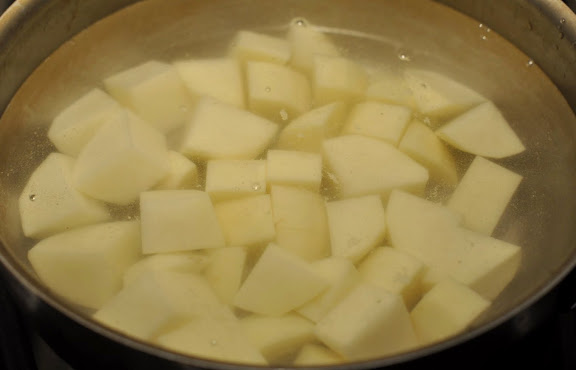
While the dough rests, make the filling. You can fill pierogi dough with just about anything (but fillings made up with relatively dry ingredients — meaning not liquid — work best), but we decided to go with the classic potato and cheese filling. Peel a couple of baking potatoes and cut them into 1 inch pieces, then boil them in salted water until they are fork-tender — about 20-25 minutes.
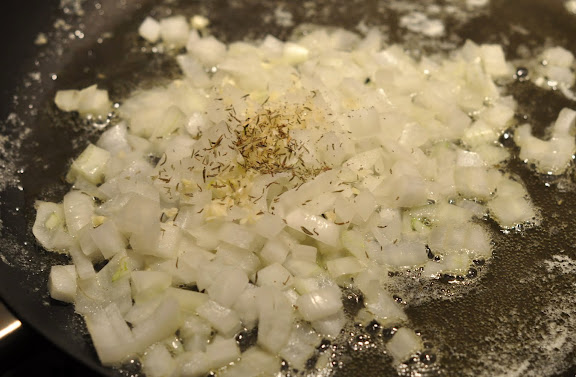
Heat a couple of tablespoons of butter and a tablespoon of oil in a large non-stick skillet over medium-high heat, then add chopped onion, minced garlic and a pinch of dried thyme and cook until the onion turns soft and translucent — about 4-5 minutes.
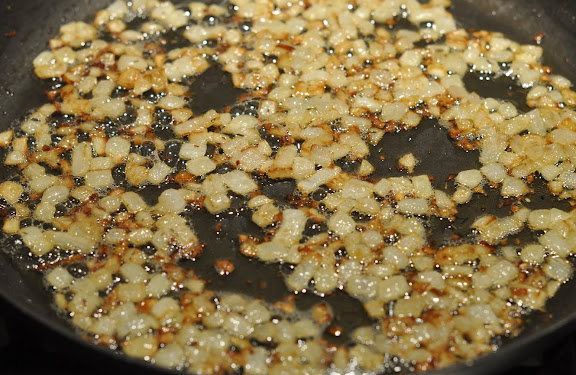
Lower the heat and continue cooking the onion mixture until the onions begin to caramelize — about 20 minutes.
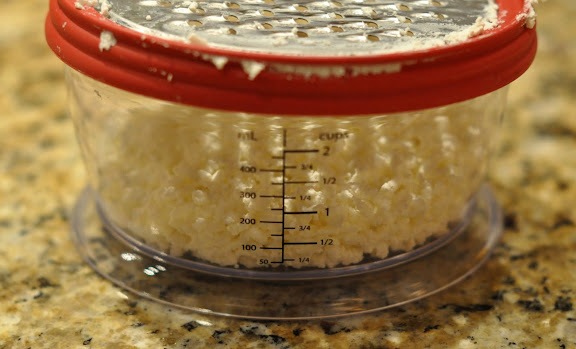
Grate the cheese. The recipe calls for “dry farmer’s cheese.” We weren’t really sure what that is (and still aren’t), but according to Google, “farmer’s cheese” is an un-ripened crumbly cheese (so not helpful.) We found a farmer’s cheese at our local Central Market. If you can’t find it, any sort of mild, hard cheese will probably work. Several pierogi recipes even call for cheddar, although you don’t want to use too much, so you don’t overpower the potato flavor.
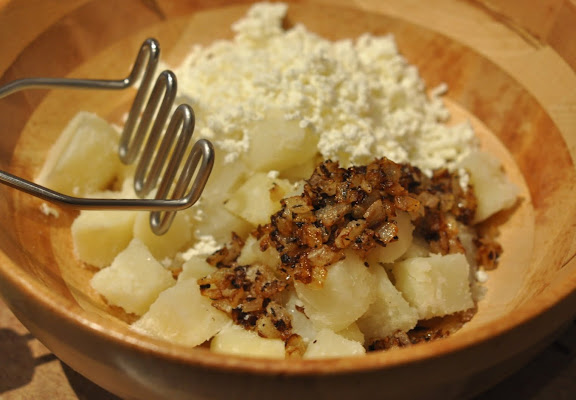
Drain the cooked potatoes, then combine them with the cheese and caramelized onions in a large bowl. Mash the potato mixture until well-combined and any large lumps are gone.
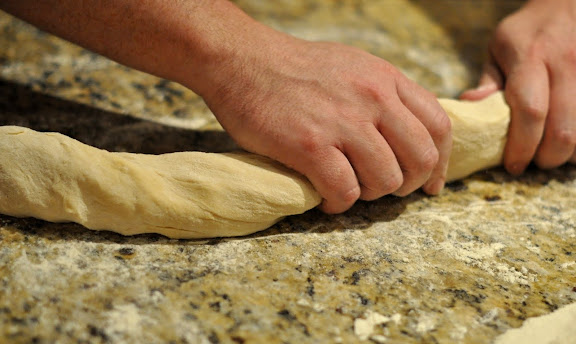
On a well-floured surface, roll out the dough into a long cylinder about 2 inches in diameter.
Cut the dough into uniform pieces, about 3/4 inch thick, give or take. This being our first time making pierogi, we were flying a bit blind here. The original recipe calls for pinching off pieces of the dough and rolling them into small balls to then roll out into flat rounds that will form the pierogi. But we also watched a YouTube video of a lady that we (probably stereotypically) assumed was a Polish grandmother who cut hers into pieces like this, so we went with that. The point is to roll out the pierogi individually — rather than rolling out a large piece of dough and cutting circles from it — in order to get more delicate and tender finished pierogi.
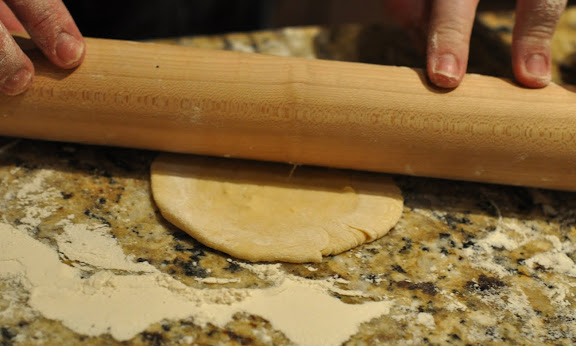
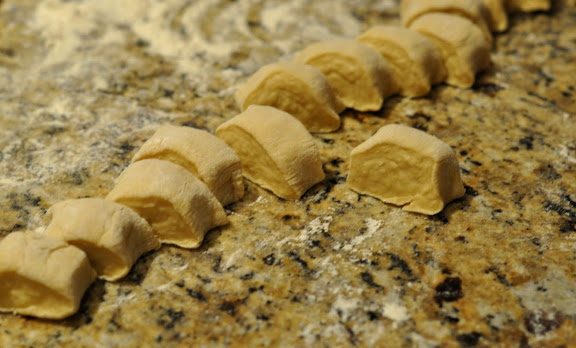
Roll out each piece into round disks about 1/8 inch thick. (Again, give or take amounts of thickness — too thin and they’ll break, too thick and the dough flavor overwhelms. We ended up with a few of both. Just do the best you can.)
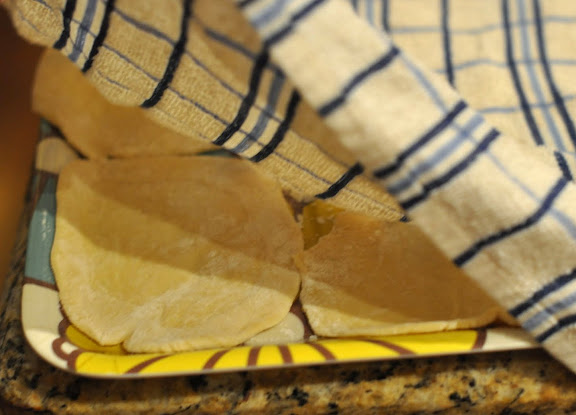
Depending on how many pierogi you’re making, cover the disks with a moist towel while you continue rolling out additional disks so that they don’t dry out.

Place a dollup of filling in the middle of each dough disk, then fold the dough over, pull the edges out and press them together to seal.

Use a fork to press the edges together and seal them further (and give them an authentic pierogi look.)
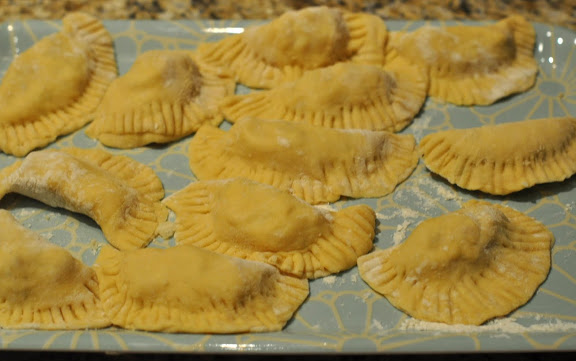
Place the pierogi on a tray (try not to overlap them too much to keep them from sticking together) and cover with plastic wrap until you’re ready to cook them. If you plan to freeze any pierogi, place the tray of un-cooked pierogi in the freezer so that they freeze without touching each other, then you can store the frozen pierogi in a plastic bag in the freezer.
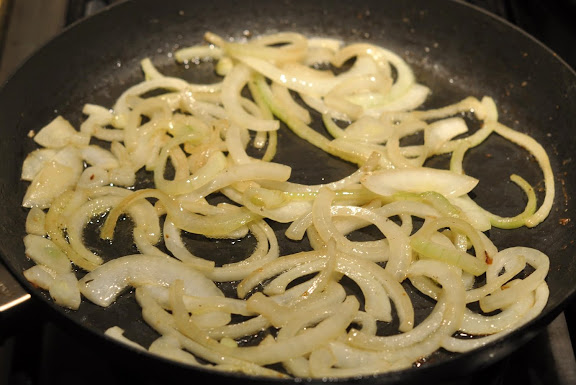
Heat about a tablespoon each of butter and olive oil over medium-high heat and saute onion slices until they begin to brown.
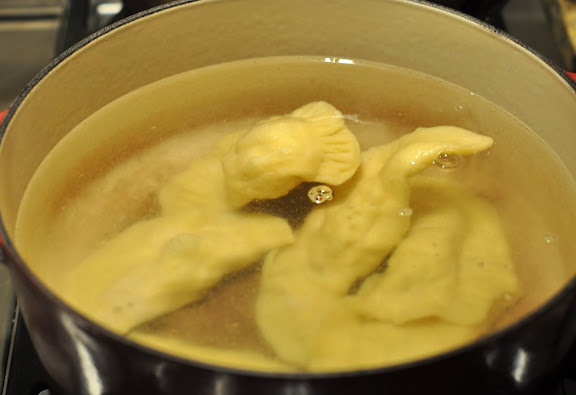
While the onions cook, boil the pierogi in small batches in a pot of salted water for about 2-4 minutes after the pierogi rise to the surface of the water. Set the boiled pierogi aside.
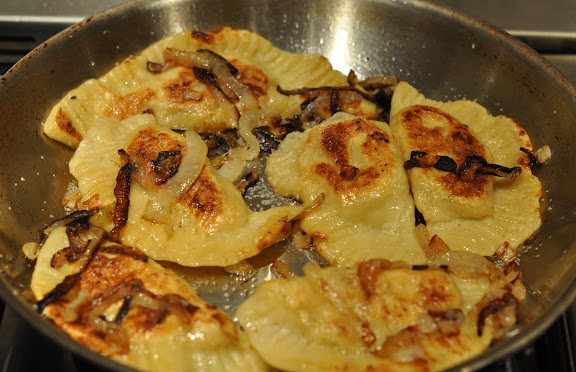
Also working in batches, saute the boiled pierogi with the onions until browned on both sides.
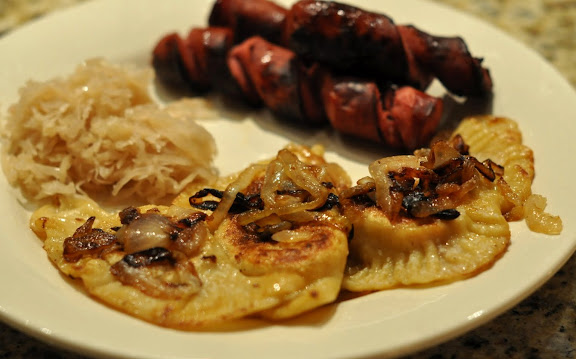
Serve with kielbasa and sauerkraut (or extra pierogi if you detest sauerkraut as much as I do.) Here’s hoping that the next football season holds less injuries and turnovers for the Steelers, and more indigenous city foods for Foodie Lawyer. Looking forward to S.O.C.C. 2013!
Can’t wait to see what you guys cook up for Steelers playoff games!
Aw, that’s just mean. (But also funny.)