A few weeks ago we posted Grilled Veggie Pizza, and I caught some grief for using a pre-made pizza crust – even being accused of “cheating.” So we decided to give homemade pizza dough a try, and we were thrilled at how delicious it was. The end result was not necessarily very photogenic, but by calling this pizza “rustic,” it makes it appear that we intended it to be so mis-shaped. And it tasted amazing, which matters most.
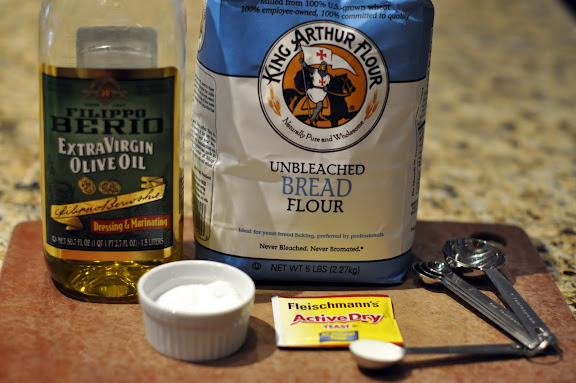
We used a recipe for homemade pizza dough from Simply Recipes(R), which is a great food blog, well worth checking out. The pizza dough recipe is fairly simple and uses bread flour, water, salt, dry yeast, a small amount of sugar, and some extra virgin olive oil. If you don’t have bread flour, regular all-purpose flour also will work, but bread flour gives you a crispier crust.
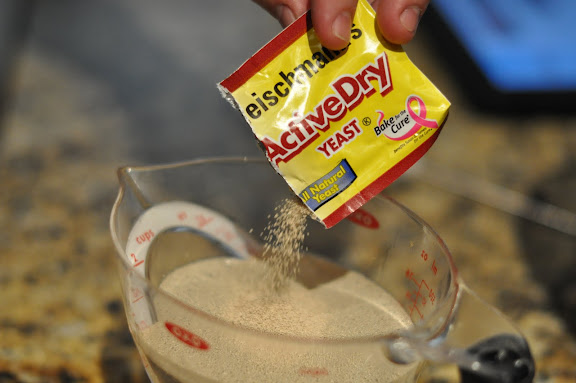
Start with a packet of dry yeast in a cup and a half of warm water. Remember when you cook with yeast that it is, essentially, alive. If the water in which you put the yeast is too cold, the yeast will take too long to “wake up,” but if the water is too hot, the yeast will die. Shoot for 100 to 110 degrees.
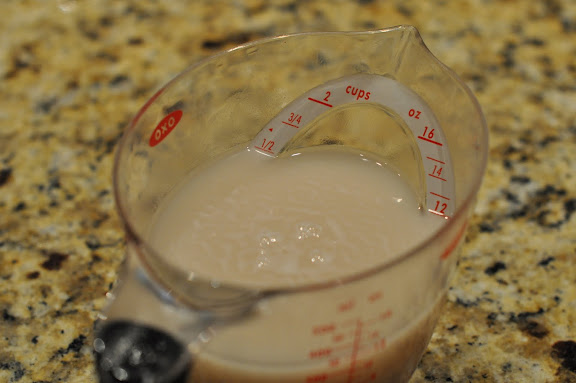
After 5-10 minutes, the yeast has dissolved in the warm water and is ready to be added to the remaining ingredients.
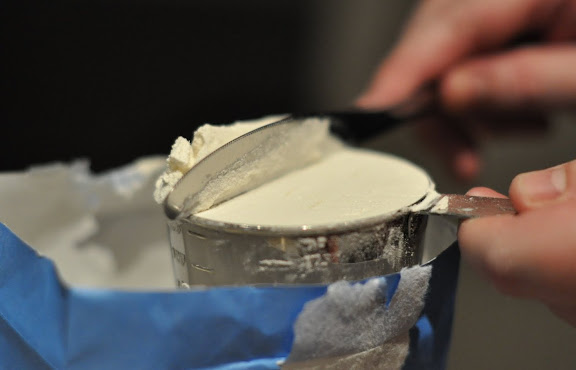
Three and a half cups of flour. This is one of the rare times that you’ll see me actually measuring ingredients because when baking, precision is essential (which is why I generally don’t bake). Use the back side of a kitchen knife to scrim off the top of the flour from the measuring cup to make sure you have an accurate measurement.

One tablespoon of olive oil. Many dough recipes omit the olive oil, but one of my culinary heros Ruhlman includes olive oil in his pizza dough, which is good enough for me.
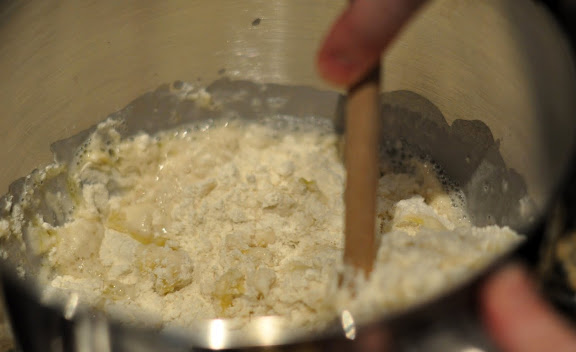
Add the flour, salt, sugar, yeast-water and olive oil to the mixing bowl of a stand mixer, and stir it all with a wooden spoon to combine.
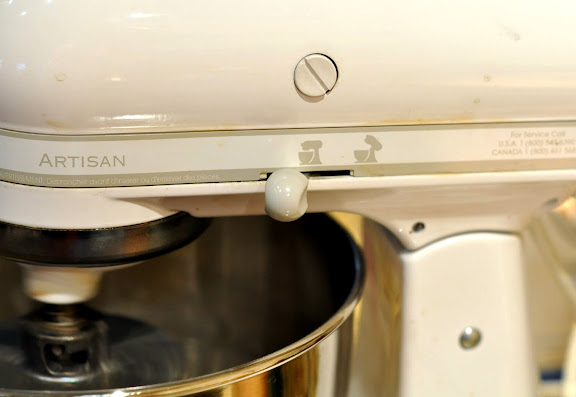
Using the dough hook on the stand mixer, knead the dough for approximately 10 minutes. When we posted about homemade pasta we mentioned that at times, you need to hold down the mixer because the top begins to “buck” when the dough gets more stiff. Well, it turns out that most stand mixers actually have a switch that locks the top down, so there’s no need to hold it. I’ve had this mixer for 5 years and just realized what this damn switch is for. Real smart. (And apparently we haven’t wiped down the outside of the mixer in 5 years either).
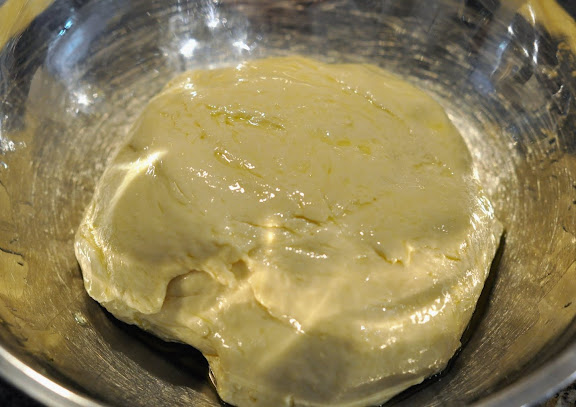
After the dough has kneaded, add a few teaspoons of olive oil to a bowl. Place the dough in the bowl and turn the dough to coat it evenly in the oil. Cover the bowl with plastic wrap or a damp cloth, and place somewhere warm (75-80 degrees is ideal) for an hour and a half to 2 hours. We put ours outside in the shade. Gotta love Fall in Texas (and I use the phrase “Fall in Texas” very loosely).

While the dough is rising, make your simple pizza sauce. We started with one and a half cloves of garlic, sliced as thinly as is possible.
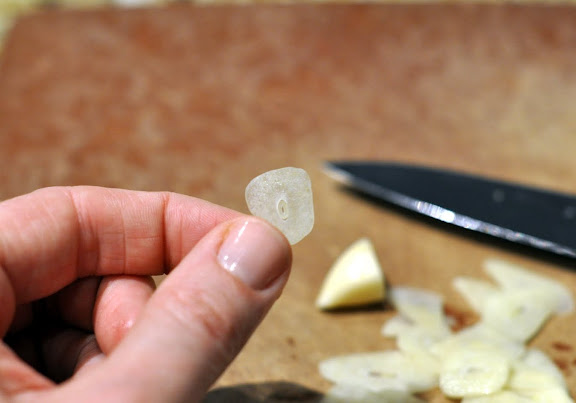
A very sharp knife makes slicing the garlic into super thin pieces much easier. Here, Kelly is demonstrating that this Shun chef’s knife can slice to approximately a molecule in depth.
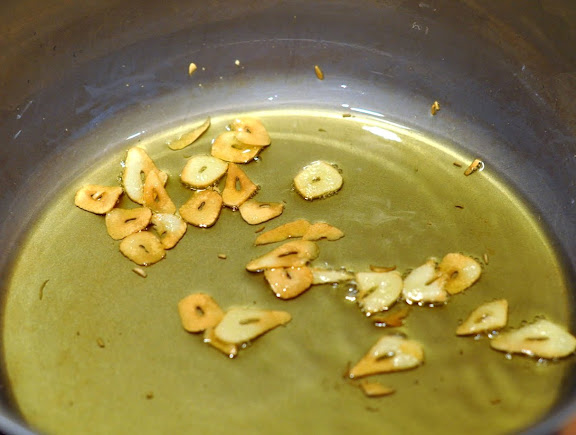
Sauce the garlic in olive oil until the garlic starts to brown.

Add a 15 oz can of diced tomatoes (use good quality canned tomatoes if you can get them — Hi Mrs. O’Brien!).
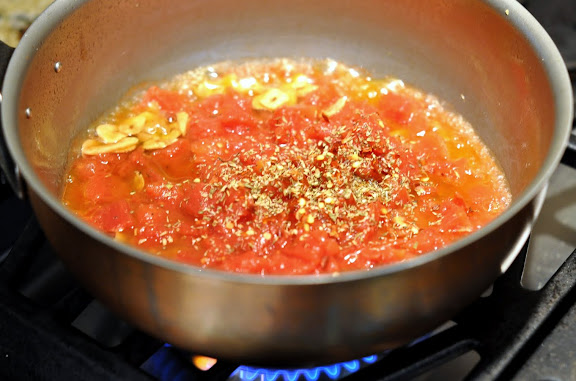
The only other spices we use in our pizza sauce are oregano and crushed red peppers. Stir, and cook over low heat for at least 20 minutes. When stirring the ingredients together, you may want to try to break up some of the bigger pieces of garlic, such that no one gets a mouthful of garlic in a single pizza bite. Unless that’s how you like your pizza – we don’t judge.
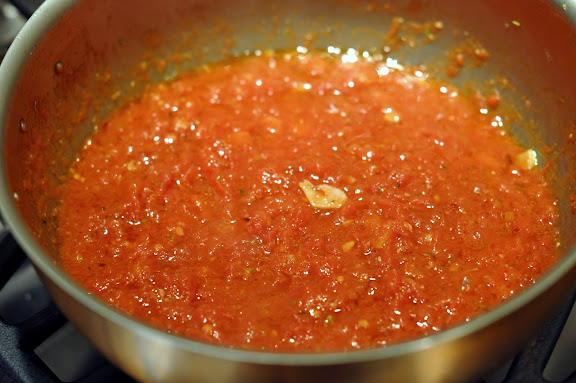
After 20 minutes or so, the sauce is ready. We turned off the heat until it was time to build our grilled pizza. You may want to fish out any remaining big pieces of garlic.
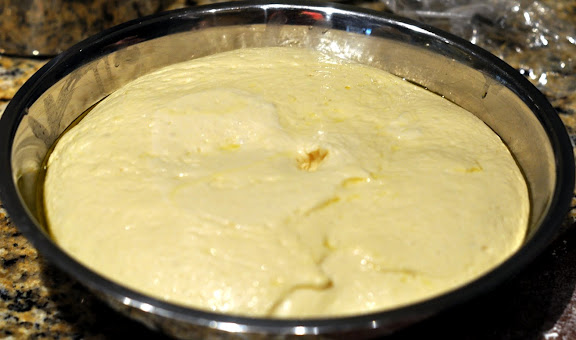
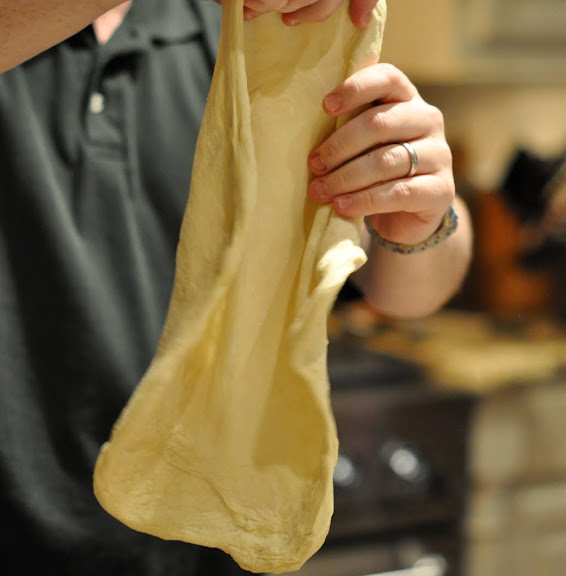
The dough has risen to the challenge!
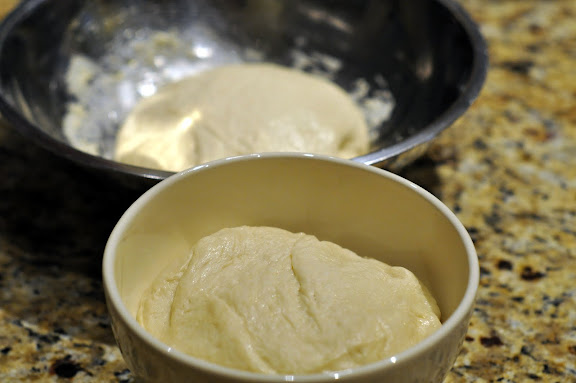
This recipe makes enough dough for two pizzas, so we placed the dough on a cutting board, cut the dough in half with a chef’s knife, and separated the two halves into separate bowls. We covered the smaller bowl with plastic wrap and placed it in the fridge to use the next day (what can we say, we love pizza). This dough should keep in the fridge for several days at least.
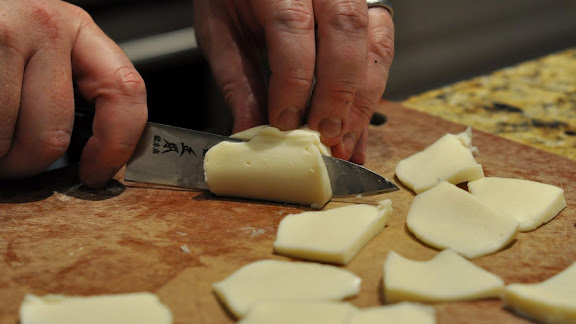
Slicing some fresh mozzarella.
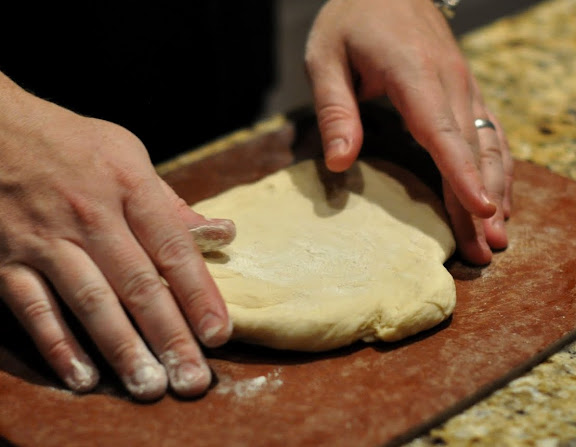
It’s time to make the pizza. Working with floured hands to minimize the dough from sticking, start pressing the dough into the desired shape.
We were planning on a rectangular-shaped pizza tonight, and to get that shape, I attempted to stretch the dough.
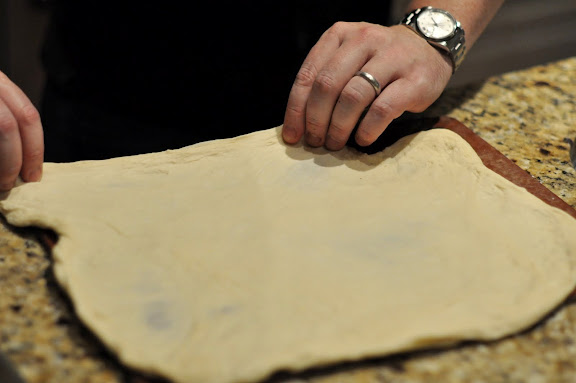
Shaping pizza dough into a rectangle was not as easy as I planned, but I got it approximately close to that shape.
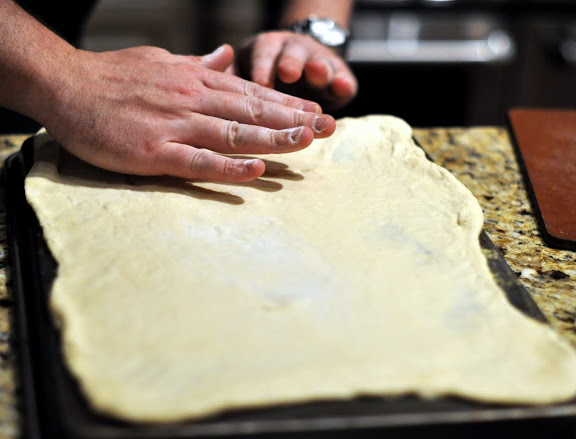
We moved the pizza dough to the grill on the back of a cookie sheet, which had been coated with cornmeal to keep the dough from sticking to the sheet.
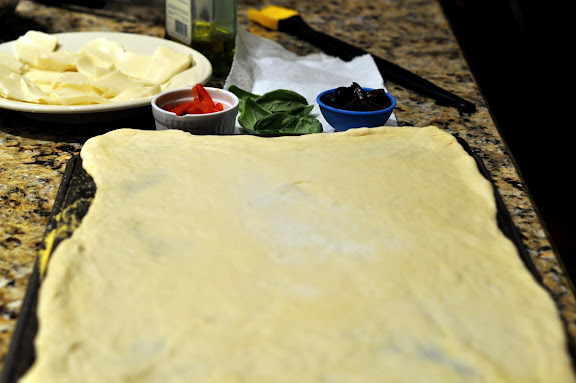
Pizza on the grill cooks quickly, so it is important to have your ingredients assembled before you head to the grill. On this night, we topped our pizza with kalamata olives, roasted red peppers, mozzarella cheese and a little fresh basil.
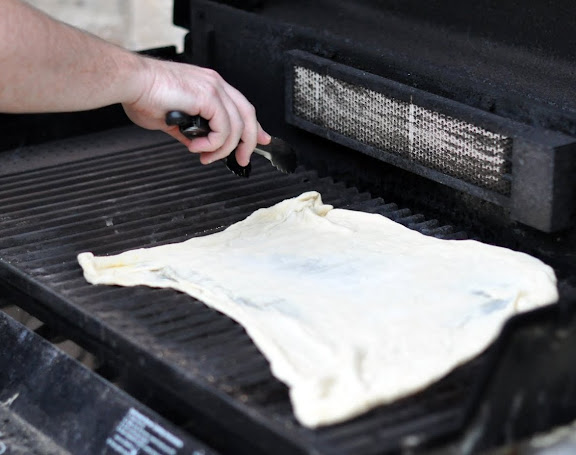
Place the pizza dough onto a preheated grill over direct-medium heat.
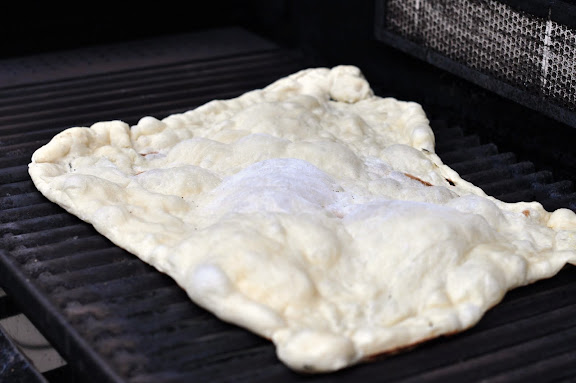
After a few minutes, the pizza dough starts to puff up and get nice grill marks on the bottom. At this point, our intended rectangular shape is all gone, and the pizza ultimately ended up shaped more like a very crude map of the United States.
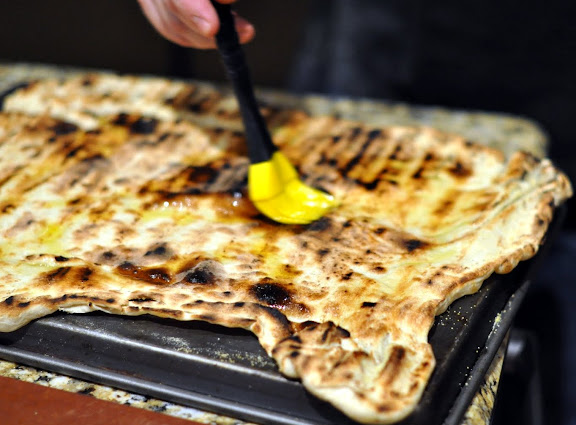
Take the half-completed dough off of the grill on the same cookie sheet, and turn it over so that the grilled side is up. Brush the top quickly with some good quality olive oil. (Be sure to get Florida in the bottom right.)
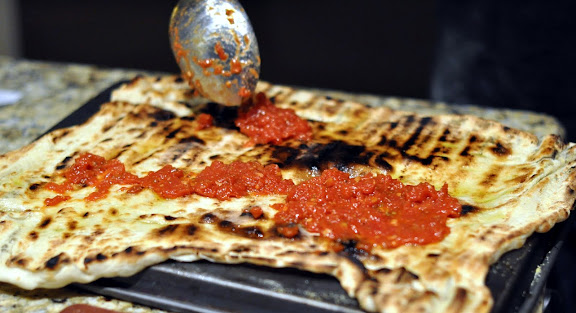
Now for the pizza sauce. When grilling pizza, it is very important to use a light hand when applying sauce and toppings. We only used about a half cup of pizza sauce.
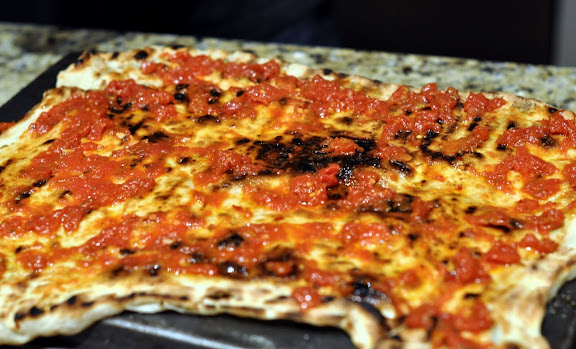
Distribute the pizza sauce as evenly as possible using the back of a large spoon. Again, use much less sauce than you think is necessary.
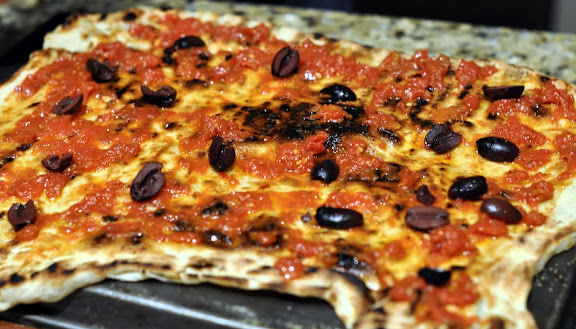
Now for toppings! We started with pitted, halved kalamata olives.
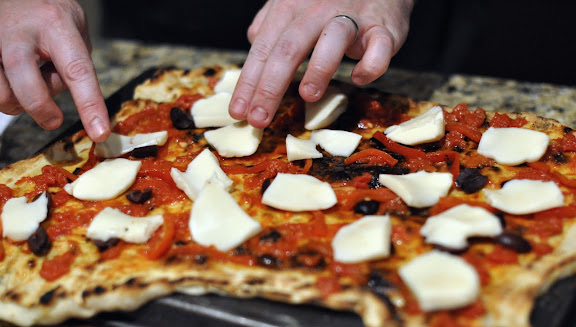
Mozzarella cheese and some roasted red peppers…
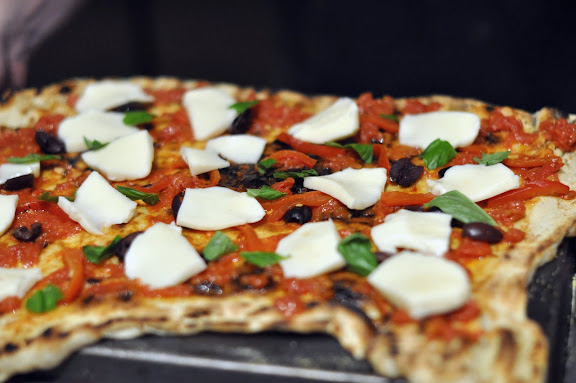
Finally, some fresh basil, torn into small pieces.
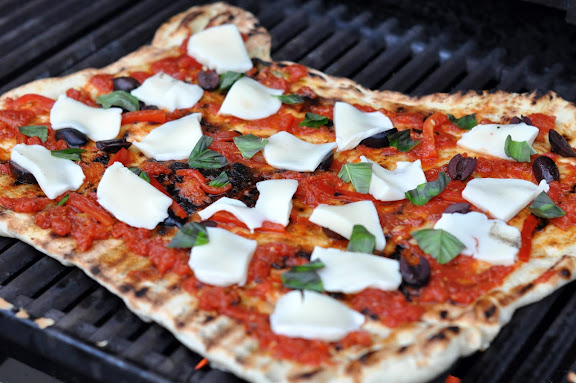
Place the pizza back on the grill and close the lid to keep in the heat and melt the cheese. Check the pizza after a few minutes and cook until the cheese is nicely melted, keeping the lid closed as much as you can. (Especially YOU, Mrs. FoodieLawyerPhotographer)
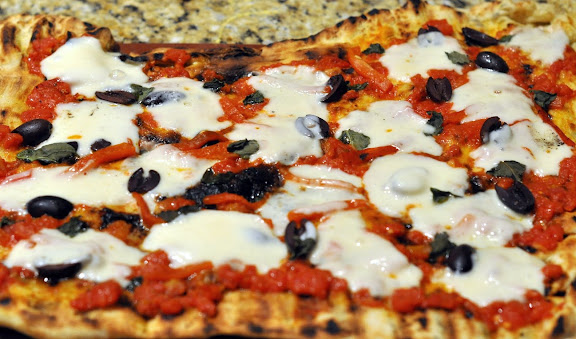
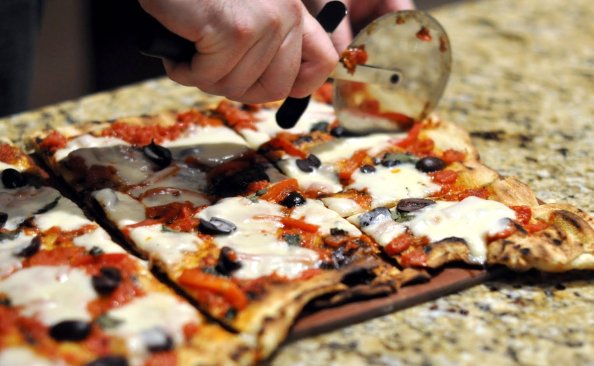
The finished pizza should rest for a few minutes before you slice and serve. This is a long, long few minutes.
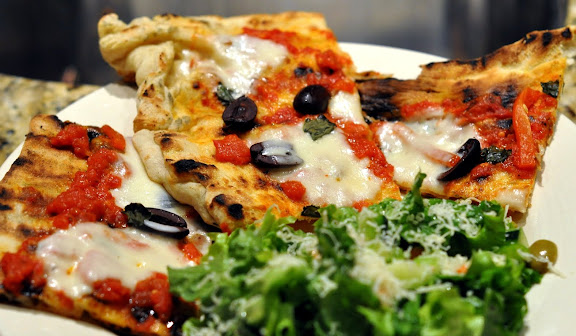
Dinner is ready! Rustic grilled pizza with a simple side salad. The dough was crispy, and the sauce was just spicy enough. The dough was easy to make, and while I still need some practice in shaping the ultimate pizza, the added flavor and texture of the homemade pizza dough made it a clear favorite over the pre-made varieties. We’re sold on homemade pizzas, even the rustic ones. (But we’ll probably still use the pre-made crust in a pinch during the week, cheating or not!)
7zoqwi